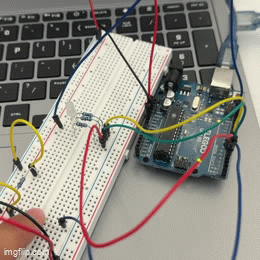
Left: A short GIF of the LED lighting up and "fading" in brightness before deactivating. Note that the camera doesn't capture the fade effect entirely.
Left: A short GIF of the LED lighting up and "fading" in brightness before deactivating. Note that the camera doesn't capture the fade effect entirely.
        // Gradually lights up and turns off a 4-pin RGB LED with the push of a button
        // Partly based on the Arduino built-in "Button" example

        // Constants used to identify specific pins
        const int buttonPin = 2; // number of the pushbutton pin
        const int redPin = 3; // number of the red LED pin - PWM pin
        const int grnPin = 4; // number of the green LED pin
        const int bluPin = 5; // number of the blue LED pin - PWM pin

        // Changing variables
        int buttonState = 0;  // variable for reading the pushbutton status

        void setup() {
          pinMode(redPin, OUTPUT); // Initialize the red LED output
          pinMode(grnPin, OUTPUT); // Initialize the green LED output
          pinMode(bluPin, OUTPUT); // Initialize the blue LED output
          pinMode(buttonPin, INPUT); // Initialize the button pin as an input
        }

        void loop() {
          buttonState = digitalRead(buttonPin); // Read the button value

          // Turns on all LEDs if the button is pushed (3s)
          if (buttonState == HIGH) { // If the button is pushed (state is HIGH)
            for(int i = redPin; i <= bluPin; i++) { // Cycle through all LEDs
              digitalWrite(i, HIGH); // Turn on (state HIGH) the current LED
              delay(1000); // Wait 1s before turning on the next LED
            }

            // Simulates a duty cycle to reduce the brightess (1.7s)
            for(int i = 100; i > 0; i--) { // Duration of lower brightness
              digitalWrite(redPin, LOW); // Turns off the red LED
              digitalWrite(grnPin, LOW); // Turns off the green LED
              digitalWrite(bluPin, LOW); // Turns off the blue LED
              delay(15); // 15ms off
              digitalWrite(redPin, HIGH); // Turns on the red LED
              digitalWrite(grnPin, HIGH); // Turns on the green LED
              digitalWrite(bluPin, HIGH); // Turns on the blue LED
              delay(2); // 2ms on
            }

            // Uses analogWrite on the PWM pins to reduce brightness (0-256)
            analogWrite(redPin, 50); // Red LED duty cycle
            analogWrite(bluPin, 50); // Blue LED duty cycle
            delay(1700); // Wait 1.7s

            // Turn off the LEDs
            digitalWrite(redPin, LOW); // Turns off the red LED
            digitalWrite(grnPin, LOW); // Turns off the green LED
            digitalWrite(bluPin, LOW); // Turns off the blue LED
          } else { // If the button state is LOW
            // Turn off the LEDs
            digitalWrite(redPin, LOW); // Turns off the red LED
            digitalWrite(grnPin, LOW); // Turns off the green LED
            digitalWrite(bluPin, LOW); // Turns off the blue LED
          }
        }
1. Graph:
2. Each of the three LEDs making up a color in the RGB LED draws 20 mA, so by following
the code it's possible to approximate how long it would run with a 1200 mAh battery.
Firstly, turning on the LEDs one by one means one LED runs for 3s, one runs for 2s, and one
runs for 1s, for a total of 120 mA over 3 seconds.
Next, the duty cycle runs 100 times with the LEDs all on for 2ms each time, leading to 12
mA in this period for a total of 1.7 seconds.
Finally, the analogWrite function uses a duty cycle of 50/255 to reduce the PWM pins'
brightness, so for an additional 1.7 seconds the red and blue LEDs' current is reduced to
about 19.6%. In this period the LEDs draw about 34 + 2(6.7) = 47 mA.
In total, the LEDs draw about 120 + 12 + 47 = 179 mA over a period of 6.4 seconds.
Therefore, the 1200 mAh battery (72,000 mA minutes or 4,320,000 mA seconds) would power
this circuit for about 43 hours: 4,320,000/(179/6.4) = 154,458s = 42.9 hours.
3. I used my multimeter to test one of the 1.8V LEDs in a circuit with a 220 Ω resistor. I measured an actual value of about 3.9V, versus the theoretical forward voltage of 3.2V. I would attribute this mismatch to differences between the hardware and the ideal calculations which I made earlier.
4. I did not use any AI tools during this assignment.